source("https://link.biometryhubwaite.com/installpackages"); required_packages()Installing and Configuring R and RStudio
Introduction
Welcome!
This guide provides a brief introduction and a step-by-step guide on the installation of all software requirements for the Biometry Hub workshops including R, Rstudio and required packages. It may also be useful for other situations such as an internship or student project with the Biometry Hub. You can find a PDF copy of this guide here: https://biometryhub.github.io/installing-r/installing-r.pdf
We will be using the R environment for statistical computing and graphics, so we need to install the following:
- The language platform - R
- An integrated development environment (IDE) - RStudio, which serves as the front end, or interface, for R.
- Additional packages (if required).
Installation of additional packages will be required for later courses (e.g. biometryassist and ASReml-R), but for the first course Introduction to R, R and RStudio are enough.
This guide assumes you are running a relatively recent version of Microsoft Windows, for example Windows 8 or later, or Mac OS X/macOS 10.11 (El Capitan) or later.
R and RStudio are available for some of the most common Linux distributions (DEB and RPM packages available), and there is no problem using Linux for the courses, but unfortunately these installation instructions do not cover installation on Linux. There are several guides available on the internet, so if you have problems we suggest this is a good starting point.
Installation
R
R is a language and platform for statistics, computing and graphics, that is freely available. Among the functions in R are facilities to handle data, integrated tools for data analysis, graphics facilities for data analysis and a simple, well developed programming language. For more information please visit the R project homepage listed in Further resources.
Windows
- Go to https://cran.rstudio.com/bin/windows/base/release.htm to download the most recent version of R onto your computer.
- Run the downloaded file by opening the folder where you downloaded the file and double clicking on the filename (e.g. R-4.3.1.exe).
- Installation to
C:/Program Filesis recommended, which may require administrative privileges. - Follow the prompts in the installation. For our purposes, the installation defaults are satisfactory, so you can simply click on
Nextthrough the installation until it is complete.
Mac
- Go to https://cran.rstudio.com/bin/macosx/ and download the most recent version of R for your version of macOS onto your computer.
- macOS 11 (Big Sur) and later (Apple M1 Chips or later): At the time of writing R 4.3.1 was the latest version.
- macOS 11 (Big Sur) and later (Intel 64bit): At the time of writing R 4.3.1 was the latest version.
- macOS 10.13 (High Sierra) and later (Intel 64bit): At the time of writing R 4.2.3 was the latest version.
RStudio
RStudio is a powerful interactive development environment (IDE) for R which adds tools to make working with R easier. It is the recommended environment for all Biometry Hub training courses. In this section we describe the setup of RStudio.
Windows
- Download the latest version from https://posit.co/download/rstudio-desktop/#download.
- Run the downloaded file by opening the folder where you downloaded the file and double clicking on the filename.
- Installation to
C:/Program Filesis recommended, which may require administrative privileges. - As with the R installation, the installation defaults are fine.
Mac
- Download the latest version from http://rstudio.org/download/latest/stable/desktop/mac/RStudio-latest.dmg.
- Run the downloaded file by opening the folder where you downloaded the file and double clicking on the filename.
- As with the R installation, the installation defaults are fine.
Check
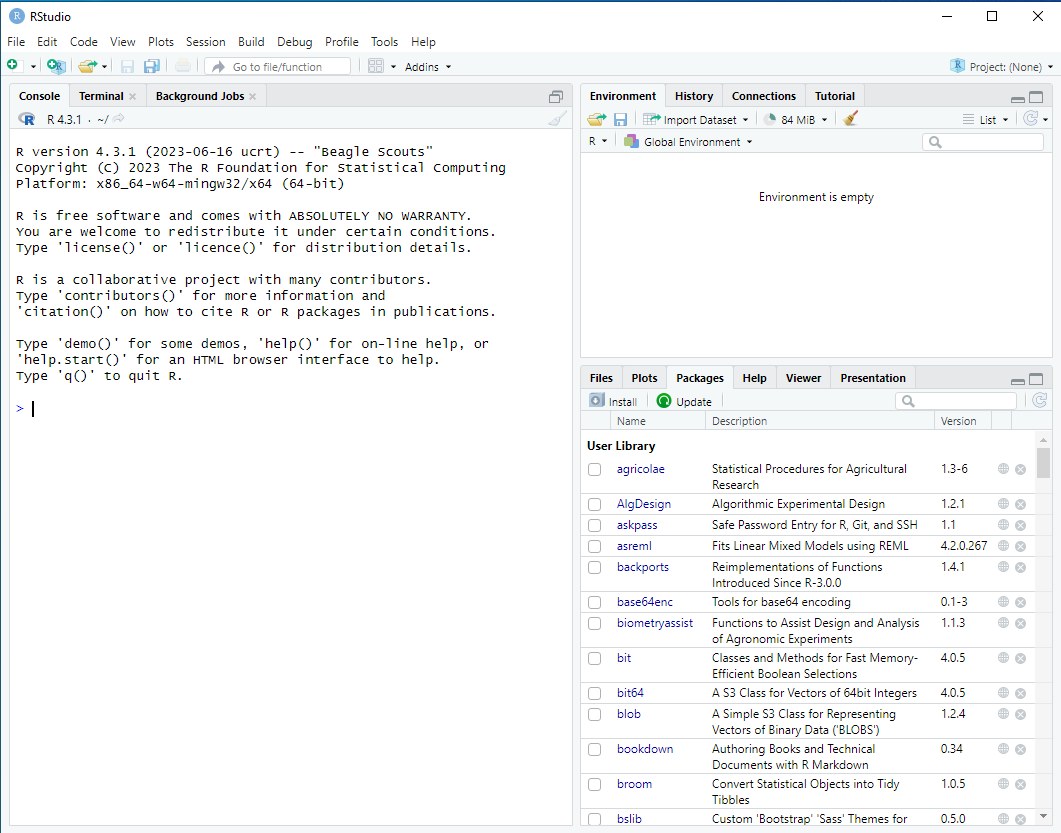
Check that R and RStudio have installed correctly by opening RStudio. By default, RStudio usually doesn’t install an icon on your desktop, so search in the Start Menu (Windows) or Spotlight (Mac) for “RStudio”. The icon you want looks something like this:
You don’t need to click on the R icon, or run the program R, as RStudio will do this automatically for you.
RStudio should start up and look something like this:

Packages
These will be discussed further in the workshop, however to maximise learning time, please follow the following steps to install these before the workshop. The steps are identical for all operating systems.
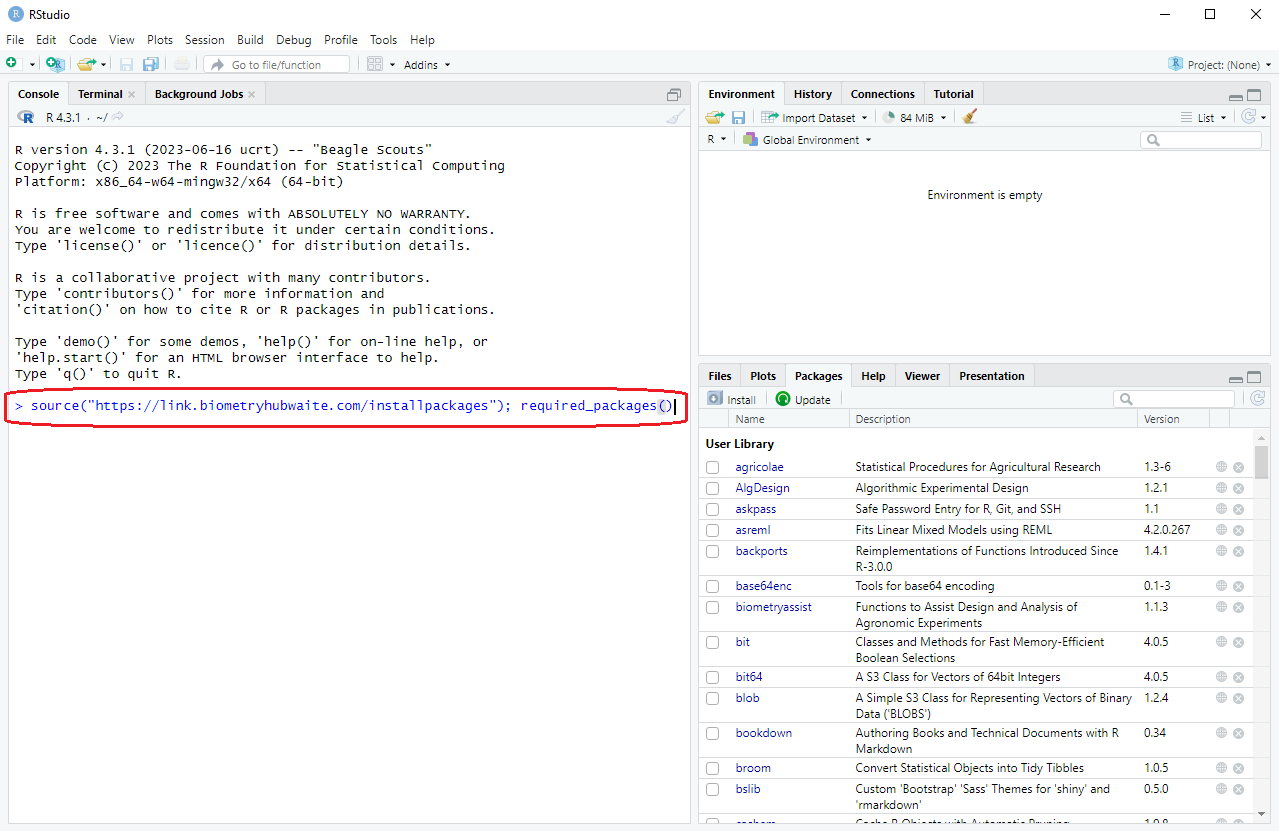
Once RStudio is open (see Check above), just copy and paste the following command next to the > arrow in the console window on the left hand side of the session (see image below for placement), and then press enter.

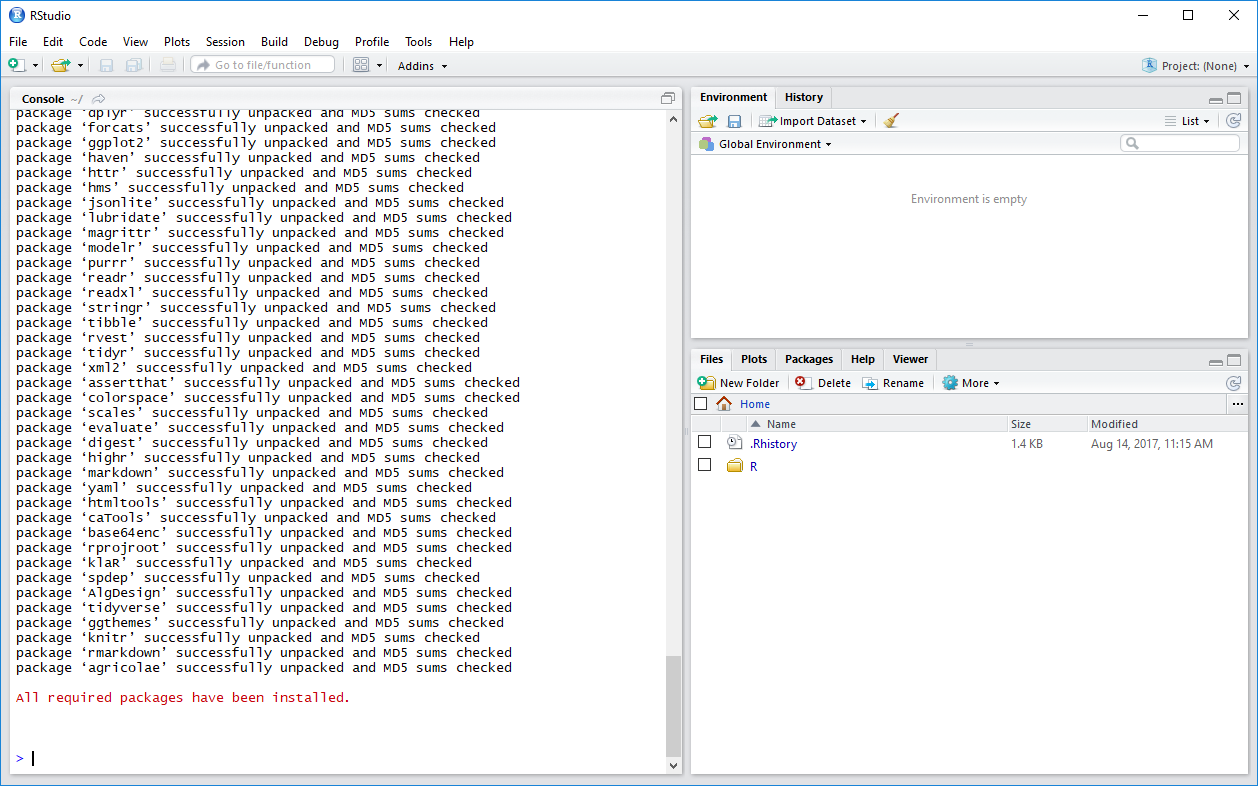
Note: This may take some time (5-10 minutes or more) depending on your internet speed and computer hardware. You will notice some red text appears in Rstudio, eventually followed by black text. This is normal and no cause for concern. You needn’t read or record any of the text. Here is an image of what this step will look like:

If this completes successfully, you will see “All required packages have been installed.” probably in red text. If there is an error, the installation will provide some instructions.
Done!
Congratulations! If you have made it this far, you are now set up and ready for the workshop.
If you have experienced issues or errors and the software has not installed correctly, please contact us early via email. Alternatively, you can arrive 15 minutes early for the workshop to allow time to get the software installed and ready.
Further resources
The above will get your basic setup ready but here are some links if you are interested in reading a bit further.
- R project homepage: https://www.r-project.org/
- RStudio homepage: https://posit.co/products/open-source/rstudio/
- How to Use RStudio: https://support.posit.co/hc/en-us/categories/200035113-Documentation
- R Installation and Administration: https://cran.r-project.org/doc/manuals/R-admin.html
- R FAQ: https://cran.r-project.org/doc/FAQ/R-FAQ.html